Thank you for reading this post, don't forget to subscribe!
To get a study visa for the United States, choose an eligible school, gain admission, receive Form I-20 or the appropriate program document, complete the required visa application, pay the required fees, prepare your financial and academic records, and attend a visa interview when required. Approval depends on your eligibility and the facts of your case.
For students planning to study in the United States, a student visa is a key part of the move from a home country to an American classroom. Whether you want to earn a college degree, study English, or complete vocational training, you must first identify the correct immigration category and meet its requirements. The process begins with choosing an eligible school, not with booking a visa interview.
The main U.S. student visa categories are F-1 for academic study and M-1 for vocational study. Students taking part in approved exchange programs may need a J-1 exchange visitor visa instead. Each category has different rules, so the right choice depends on the course, school, and program structure.
This guide explains how to get a study visa for the USA, prepare your application, show that you can afford your education, and get ready for the interview. It also covers common mistakes, possible delays, and what to do after approval. Requirements and appointment procedures can change, so confirm the latest instructions with the official U.S. Department of State and the embassy or consulate where you will apply.
A study visa is an immigration document that allows an eligible foreign national to travel to another country for an approved educational purpose. In the United States, the correct visa category depends on the kind of program you plan to attend. A student visa is not the same as school admission, and neither one automatically guarantees permission to enter the country.
Students should also understand the difference between a visa and immigration status. A visa generally allows a traveler to seek entry at a U.S. port of entry. Once the traveler arrives, a Customs and Border Protection officer decides whether to admit the person. The student’s authorized stay and obligations then depend on the applicable immigration rules and status.
For most people who want to complete a full-time academic or vocational program in the United States, the F-1 or M-1 category is the starting point. A short recreational course that does not lead to academic credit or a degree may be treated differently. Never assume that a tourist visa permits a full course of study.
Source: savisacentral.com
F-1 student visa
Generally applies to international students attending an eligible academic institution, such as a university, college, private elementary or secondary school, seminary, conservatory, or qualifying language training program.
M-1 student visa
Generally applies to students pursuing qualifying vocational or other nonacademic training at an eligible institution.
J-1 exchange visitor visa
Applies to participants in designated exchange programs, including qualifying educational and research programs. The program sponsor determines the relevant eligibility and documentation requirements.
Which Student Visa Should You Choose?
Start by matching your intended course to the visa category. A bachelor’s or master’s degree program will usually require the F-1 category. A qualifying technical or vocational program may require the M-1 category. A university exchange arranged through an approved sponsor may require the J-1 category.
If you are unsure, ask the school’s international student office or your exchange program sponsor. Confirm the category before paying application fees, because using the wrong process can cause delays or lead to a refusal.
Academic degree
Check whether the school and program qualify for F-1 status.
Vocational training
Confirm whether the program requires M-1 status.
Sponsored exchange
Follow the program sponsor’s instructions for the J-1 process.
Step 1: Choose an Eligible School and Apply for Admission
The first practical step in getting a U.S. study visa is finding a school that offers the right program and can support the immigration process. For F-1 and M-1 students, the school must be certified by the Student and Exchange Visitor Program, commonly called SEVP. Check the school’s certification before submitting tuition deposits or paying an agent.
School certification and academic accreditation are not the same thing. SEVP certification allows an eligible school to enroll international students under the relevant student process. Accreditation concerns the institution’s academic recognition and quality standards. Check both when they matter to your education plans, professional goals, or future transfer options.
Compare more than the school’s name or location. Review course content, admission standards, tuition, housing, health insurance requirements, and the likely cost of living. A realistic budget can help you select a program that fits your academic goals and available funds.
Source: iieeducation.com
Check the school
Use the official U.S. government school search resources to verify SEVP certification for the intended program.
Review admission criteria
Check academic records, English-language requirements, test scores, recommendation letters, essays, and application deadlines.
Calculate the full cost
Include tuition, housing, meals, transportation, books, insurance, and other required expenses.
Apply for admission
Submit the school’s required forms and documents and respond promptly to requests for more information.
What Happens After You Receive an Acceptance Letter?
An acceptance letter confirms that the school has offered you admission, but it is not itself a student visa. For an F-1 or M-1 application, the school will generally collect information needed to register you in the Student and Exchange Visitor Information System, known as SEVIS, and issue Form I-20 when the required conditions are met.
Review the school name, program, personal details, program dates, and financial information on Form I-20. Ask the designated school official to correct any errors before you submit your visa application. Follow separate instructions if your program uses the J-1 exchange visitor process and Form DS-2019.
Keep your admission records
Save the acceptance letter, enrollment details, tuition information, and all messages from the school.
Check your immigration document
Make sure the information on Form I-20 or Form DS-2019 matches your intended program.
Step 2: Prepare Your Student Visa Documents
Preparing the correct documents is one of the most useful ways to reduce avoidable delays. The exact list depends on your visa category, nationality, personal circumstances, and the instructions of the embassy or consulate handling your case. Gather the core documents first, then check whether additional evidence is required.
For an F-1 or M-1 application, the U.S. Department of State lists a valid passport, the DS-160 confirmation page, the appropriate Form I-20, and the required application fee evidence among the key items. You must also follow the local instructions for photographs, appointments, and any supporting records requested for the interview.
Do not submit false, altered, or misleading documents. If a record is missing or contains an error, ask the issuing school or organization how to correct it. Explain genuine gaps honestly rather than inventing information.
Source: edvisehub.com
Passport
Check that your passport meets the validity rules that apply to your nationality and planned stay. The general U.S. rule is validity for at least six months beyond the period of stay, unless an applicable country-specific exemption applies.
Form I-20 or DS-2019
Bring the document for your correct program category and make sure the required signatures are complete.
DS-160 confirmation
For F-1 and M-1 visa applications, complete the online nonimmigrant visa application and retain its confirmation page.
Academic records
Prepare transcripts, diplomas, certificates, test scores, and other records that support your academic background.
Financial evidence
Gather appropriate bank statements, sponsor documents, scholarship letters, or other reliable proof of funding.
Photograph and fee records
Follow the current photo specifications and retain fee receipts when required by the local process.
How Should You Organize Your Documents?
Keep a printed set and a secure digital copy of your key records. Arrange them in a clear order so you can find each document quickly during the interview. Check that names, dates, school details, and funding amounts are consistent across your forms and supporting evidence.
Some applicants may need additional documents, such as evidence of their intended academic plans, previous immigration history, or relationships with accompanying family members. Use the official checklist for your specific application rather than relying on a generic online list.
Use a checklist
Mark each required item as complete and note any document that still needs to be issued.
Check consistency
Resolve mismatches in names, dates, program details, and funding information before your interview.
Step 3: Complete the Required Visa Application
Once you have the required school documents, complete the relevant visa application. For most F-1 and M-1 applicants, this means filling out Form DS-160 online. J-1 applicants generally use the applicable exchange visitor instructions, including Form DS-160 where required, and provide the program sponsor’s Form DS-2019.
Enter your information carefully and answer every question truthfully. Your application may ask about your identity, travel plans, education, employment, family details, and prior travel or immigration history. Review your answers before submitting the form, because mistakes can require corrections or cause delays.
After submitting Form DS-160, save the confirmation page. You will generally need its barcode confirmation for your interview appointment. Follow the official instructions for the location where you will apply, since appointment systems, payment methods, and document delivery procedures can differ.
Source: nomadcredit.com
Complete the online form
Use the official U.S. Department of State application system and enter information that matches your supporting documents.
Upload your photo
Follow the official photograph requirements and bring a printed photo if the system or local instructions require one.
Pay the applicable fee
Check the current fee and payment procedure for your visa category and application location.
Save your confirmation
Keep the confirmation page, application details, and appointment information in a secure place.
Do You Need to Pay the SEVIS Fee?
Most F-1 and M-1 students must pay the SEVIS I-901 fee before the visa interview, unless an exemption applies. This fee is separate from the nonimmigrant visa application fee. J-1 exchange visitors may also have to pay a SEVIS fee, depending on their program and eligibility for an exemption.
Check the official SEVIS fee instructions to confirm the amount, payment deadline, and accepted payment methods. Keep proof of payment if required. Do not assume that paying the visa application fee also pays the SEVIS fee.
Verify the correct fee
Check the current government fee schedule rather than relying on old articles or social media posts.
Keep payment evidence
Retain the receipt and make sure the payment is associated with the correct student or exchange visitor record.
Step 4: Schedule Your Visa Interview
After completing the required application steps, arrange your visa interview according to the instructions of the U.S. embassy or consulate where you intend to apply. Interviews are generally required for student visa applicants, although limited exceptions may apply under the rules in force at the time of application. A consular officer can require an interview when permitted by law.
Interview availability varies by location, season, and visa category. Apply as soon as your documents are ready rather than waiting until just before classes begin. Review the official appointment wait-time information and leave room for possible additional document requests or administrative processing.
For most applicants, applying in the country where they live is the practical choice. Applying elsewhere may be possible, but local rules and appointment availability can differ, and it may be harder to establish eligibility when applying outside your country of residence.
Source: welkinmigration.com
Check local instructions
Confirm the appointment website, payment process, interview location, and document requirements.
Book an appropriate date
Choose an appointment that allows enough time before your program begins, without assuming that approval is guaranteed.
Review your appointment notice
Check arrival instructions, permitted items, required documents, and any rules about rescheduling.
When Should You Apply for a Student Visa?
For new F-1 and M-1 students, the U.S. Department of State generally allows visas to be issued up to 365 days before the program start date. However, a student cannot enter the United States in F-1 or M-1 status more than 30 days before the start date shown on the applicable school document.
These rules do not mean that every applicant will receive a visa within a set period. Processing times vary, and some applications require further review. Confirm the current rules and your school’s reporting dates before making nonrefundable travel plans.
Start early
Begin school and visa preparation months ahead when possible, especially if your program has a fixed start date.
Monitor your application
Follow official status updates and respond to requests for documents as instructed.
Step 5: Prepare for the Student Visa Interview
The interview helps a consular officer assess whether you qualify for the visa category. You should be ready to explain why you chose your school, what you intend to study, how the program fits your background, and how you will pay for tuition and living costs. Your answers should be clear, truthful, and consistent with your application.
There is no script that guarantees approval. A strong application presents a credible study plan supported by accurate documents. Avoid memorizing long answers or making claims that you cannot support with evidence.
The officer may ask about your previous education, employment, family circumstances, funding sources, or plans after completing the program. For F-1 and M-1 visas, applicants must meet the applicable nonimmigrant visa requirements, including the requirement to establish eligibility under the relevant legal standards.
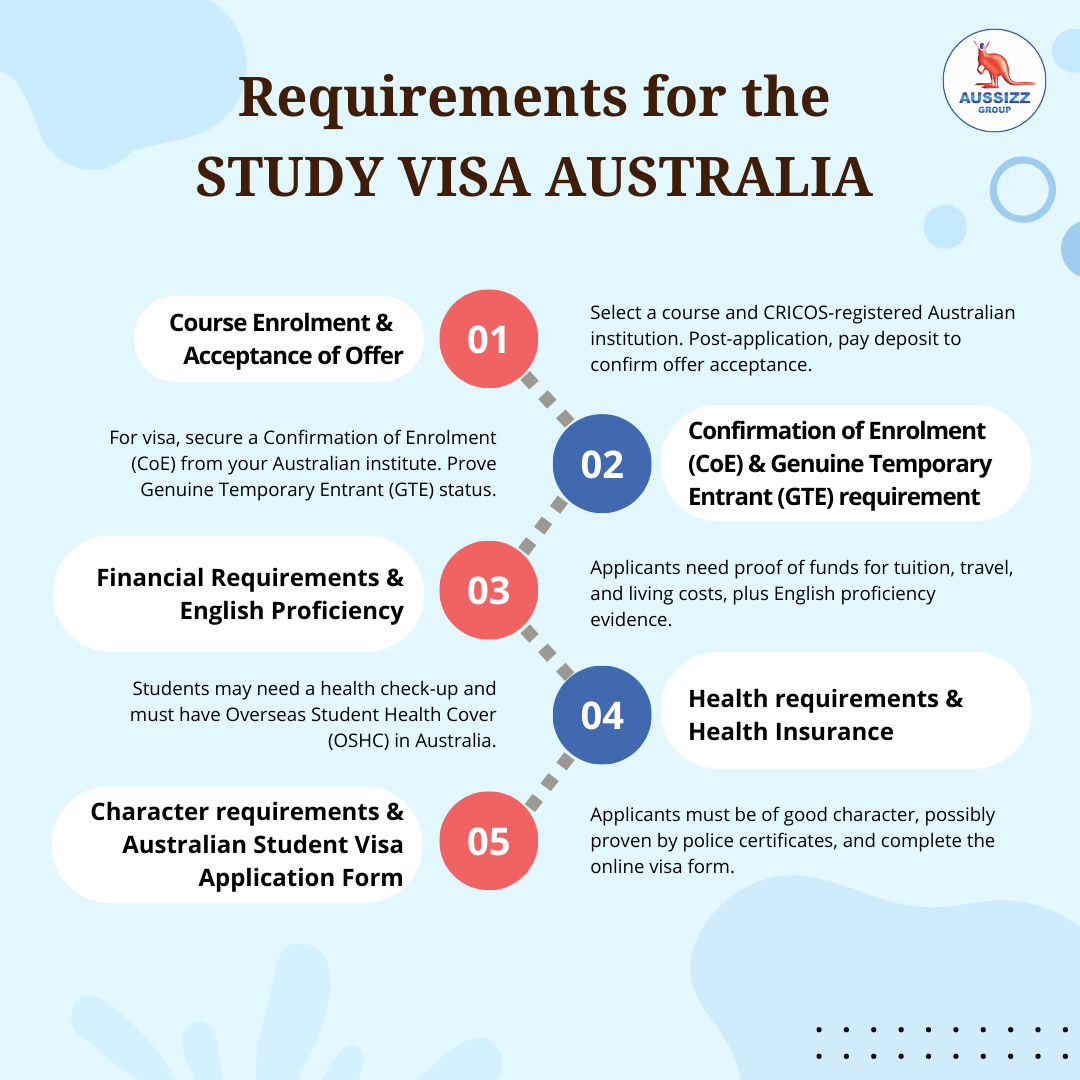
Source: aussizzgroup.com
Why this school?
Explain the specific course features, academic strengths, or training opportunities that make the program suitable for your goals.
Why this course?
Show how the course connects with your previous education, current skills, or realistic career plans.
Who will pay for your studies?
Describe your funding source and be ready to show reliable evidence of available funds.
What are your plans after graduation?
Give an honest answer that reflects your current intentions and the immigration rules that apply to your visa category.
How to Answer Difficult Interview Questions
If you receive a question about a weak grade, a study gap, a career change, or a funding issue, explain the facts directly. Provide relevant evidence when available and avoid blaming others or changing your story to make it sound stronger.
If you do not understand a question, politely ask the officer to repeat or clarify it. Do not guess about legal rules, school details, or financial figures. Review your application and program documents beforehand so that your answers are accurate.
Be concise
Answer the question asked, then provide extra detail only when it helps explain your situation.
Be consistent
Make sure your spoken answers match your forms, academic history, and funding evidence.
Be honest
Never hide a material fact or provide a false document to improve your application.
How Much Does It Cost to Get a Study Visa?
The total cost of getting a U.S. student visa includes more than the visa application fee. Applicants may need to pay a SEVIS fee, school application fees, document costs, travel expenses for an interview, and other costs related to admission and relocation. Tuition and living expenses are separate from government visa fees.
The U.S. Department of State lists a standard application fee of $185 for many F and M nonimmigrant visa applications. This amount should be verified on the official fee page before payment because fee rules can change. An additional visa issuance fee may apply to some nationalities, while the SEVIS I-901 fee is a separate charge when required.
Your school may ask for a deposit or proof that you can cover a defined period of study. These amounts are not the same as government visa fees. Review the school’s refund terms carefully before making payments, especially when a visa decision is still pending.
Source: edvisehub.com
Visa application fee
Check the current fee for the relevant category and application location.
SEVIS fee
Check whether your student or exchange visitor category requires a separate I-901 payment.
School and document costs
Budget for application fees, tuition deposits, transcripts, translations, and any required testing.
Travel and living costs
Plan for transportation, accommodation, meals, insurance, and other costs before your first paycheck or scholarship payment.
How Much Money Must You Show?
There is no single financial amount that works for every student. The evidence should show that you can meet the expected costs of your specific program and living arrangements, based on the school’s estimates and your circumstances. Costs can vary widely between institutions and locations.
For example, a hypothetical student with $28,000 in estimated first-year costs may need to document a credible funding plan that covers those costs. If the student has a $10,000 scholarship, the remaining $18,000 still needs a realistic funding source. This example illustrates budgeting only; it is not an official government minimum.
Funding may come from personal savings, family support, a scholarship, or another legitimate source. When someone else will pay, prepare evidence of the relationship when relevant, the sponsor’s ability to pay, and the amount of support available. A large bank balance alone may not explain where the funds came from or whether they are available for your education.
Calculate total costs
Use the school’s cost estimates for tuition, housing, meals, insurance, books, and personal expenses.
Document each source
Match savings, scholarships, education loans, or sponsor support to the costs they will cover.
Avoid unexplained deposits
Be prepared to explain unusual transactions or large recent deposits with genuine supporting records.
What Happens After Your Study Visa Is Approved?
Visa approval is a major step, but you should still prepare for travel and entry. Check the visa information in your passport for errors, confirm your program start date, and keep your school documents accessible. Do not assume that a visa allows you to enter the United States on any date or for any purpose.
For new F-1 and M-1 students, entry is generally not permitted more than 30 days before the program start date. Before traveling, confirm the school’s arrival instructions, housing arrangements, health insurance requirements, and any orientation or registration deadlines. Keep enough funds available for initial expenses.
At the U.S. port of entry, a Customs and Border Protection officer will inspect your travel documents and determine whether to admit you. Carry your passport, valid visa, Form I-20 or other applicable program documents, and evidence that supports the purpose of your trip. Admission is decided by the officer, not guaranteed by the visa alone.
Source: nomadcredit.com
Review your visa
Check your name, passport details, visa category, and validity dates.
Contact your school
Confirm arrival dates, housing, orientation, and enrollment requirements.
Keep documents accessible
Pack key immigration documents in your carry-on luggage rather than checked baggage.
Maintain required enrollment, report relevant changes through the school as required, and understand work restrictions before accepting employment.
Can You Work While Studying in the United States?
Some international students may work under specific rules, but a student visa is not general permission to take any job. F-1 students may qualify for certain on-campus employment and, in eligible cases, authorized practical training. M-1 students face different and generally more limited employment options tied to their vocational training.
Before starting a job, check the applicable rules with your designated school official or program adviser and obtain any required authorization. Unauthorized work can put your immigration status at risk. Do not build a study budget on the assumption that you will immediately find a job or qualify for off-campus work.
Check eligibility first
Confirm the specific employment rules for your visa category and program.
Obtain required authorization
Complete the relevant approval steps before beginning any work that requires permission.
Common Reasons for Student Visa Refusal and How to Respond
A student visa may be refused if the applicant does not establish eligibility under the relevant law. The reason depends on the facts of the case, and no single document or interview answer guarantees approval. Applicants should understand the stated refusal ground before deciding what to do next.
For example, a consular officer may have concerns about whether the applicant has sufficient financial support, whether the intended program is credible, or whether the applicant meets the requirements of the visa category. In some cases, an application may require administrative processing or additional evidence rather than an immediate final decision.
Do not assume that hiring an agent or submitting a thicker file will resolve a refusal. The useful response is to identify the actual issue, correct errors where possible, and provide relevant new evidence if you are eligible to reapply.
Weak financial evidence
Review whether the documents show the source, availability, and adequacy of the funds needed for the planned study.
Unclear study plans
Explain why the chosen course and institution make sense in light of your education and goals.
Incorrect information
Correct genuine errors and make sure future submissions are complete and consistent.
Missing documents
Follow the officer’s instructions and provide the requested records within the stated period, if applicable.
Administrative processing
Follow the official instructions and wait for the required review to finish. Do not treat additional processing as automatic approval or a guaranteed refusal.
Can You Apply Again After a Refusal?
You may be able to reapply if you believe you can establish eligibility or your circumstances have changed. Before submitting another application, review the refusal explanation and identify what new information or evidence addresses the issue. Repeating the same application without addressing the concern may not improve the result.
Visa fees are generally nonrefundable, and another application may require a new fee and appointment. If the refusal involves a complex immigration history, possible misrepresentation, or another legal issue, seek advice from a qualified U.S. immigration attorney. No consultant can guarantee that a future application will be approved.
Understand the refusal
Read the notice and identify the legal or evidentiary issue described.
Improve the evidence
Correct factual errors and gather genuine documents that address the specific concern.
Check timing
Consider the school start date, appointment availability, and whether a deferral is needed.
Important Mistakes to Avoid When Applying for a Study Visa
Small errors can lead to delays, extra costs, or serious immigration problems. A careful application is built on correct information, a credible study plan, and evidence that matches the applicant’s circumstances. Give yourself time to review the process instead of relying on last-minute fixes.
Be cautious of anyone who promises guaranteed visa approval, offers fake bank statements, or claims to have special access to consular officers. Only the authorized government officials can decide your visa application. Misrepresentation can have lasting consequences for future immigration applications.
Also avoid making major financial commitments before you understand the school’s refund policy and the risk of a delayed or refused visa. Keep records of payments and communications so you can respond to questions and manage your budget.
Do not use an unverified school
Confirm the school’s eligibility and review its academic standing before committing money.
Do not submit false records
Use genuine financial statements, academic certificates, and identity documents.
Do not ignore local instructions
Follow the embassy or consulate’s current appointment, payment, and document procedures.
Do not rely on a job to fund everything
Prepare a credible funding plan that follows the employment rules for your visa category.
Do not buy nonrefundable travel too early
Wait until your visa and travel arrangements are sufficiently certain, while allowing time to meet the program’s arrival requirements.
How to Check Whether a Visa Adviser Is Trustworthy
A legitimate adviser should explain the limits of their role, provide clear fee terms, and direct you to official government information. In the United States, an immigration attorney authorized to practice law or a Department of Justice-accredited representative working through a recognized organization may be able to provide appropriate immigration assistance.
Ask for a written agreement before paying for professional services. Keep control of your own application records and never sign a form that contains information you know is false. You can complete many application steps yourself by following the official instructions.
Verify credentials
Check professional authorization when legal advice or representation is offered.
Get clear fee terms
Ask what services are included and whether government fees are separate.
Retain your records
Keep copies of forms, payment receipts, correspondence, and submitted documents.
A Practical Student Visa Application Checklist
Use the following checklist to track your progress from school selection to travel. The exact order can vary by visa category and location, so follow the official instructions for your case. Mark an item complete only after you have verified that the required action or document is in place.
Before applying to school
Compare eligible institutions, review program requirements, check academic recognition, and estimate the full cost of study.
After admission
Confirm enrollment, obtain the appropriate immigration document, and check all personal and program details.
Before submitting the visa application
Complete the required forms, pay applicable fees, gather academic and financial evidence, and review local instructions.
Before the interview
Confirm the appointment, organize original documents and copies, and practice explaining your genuine study plans.
After the decision
Follow any additional instructions, check the issued visa, coordinate arrival with the school, and prepare for inspection at the port of entry.
What to Do If You Are Running Out of Time
Contact your school’s international student office as soon as you know that a visa appointment or decision may not arrive before classes begin. Ask whether the school can defer your start date and issue updated documents if required. Do not travel based on an assumption that a pending application will be approved in time.
Check official appointment information and application status channels regularly. If you receive a request for more documents, respond as instructed. If the delay creates a serious problem, consult the relevant embassy or consulate and the school about the available next steps.
Tell the school early
Ask about deferral options and any changes needed to your enrollment or immigration documents.
Avoid risky shortcuts
Do not use an inappropriate visa category or false documents to try to meet a deadline.
Frequently Asked Questions
Q
How long does it take to get a study visa?
There is no single processing time for every U.S. student visa applicant. The total period includes school admission, issuance of the required student document, fee payments, appointment availability, the interview, and any additional processing. Check the current appointment wait times and instructions for the embassy or consulate where you will apply, and begin as early as possible.
Q
Can I get a study visa without an admission letter?
For an F-1 or M-1 visa, you generally need to be accepted by an eligible school and receive Form I-20 before applying. An admission letter alone is not a substitute for the required immigration document. Students in approved J-1 exchange programs generally need the appropriate program sponsorship and Form DS-2019.
Q
How much bank balance is required for a U.S. student visa?
There is no universal bank balance that guarantees approval. Your financial evidence should credibly show how you will pay for the costs of your particular program and stay. Use the school’s cost estimates, account for scholarships or other confirmed support, and provide genuine documents showing the funds available to you.
Q
Can I apply for a study visa without IELTS?
Possibly. IELTS is an English-language test, not a universal visa requirement for every U.S. student visa applicant. However, the school may require IELTS, TOEFL, another accepted test, an interview, or alternative evidence of English proficiency. Check the institution’s admission policy and any requirements that apply to your chosen program.
Q
Can I work while holding a U.S. student visa?
Some students may work under specific immigration rules and authorization requirements. F-1 students may qualify for certain on-campus employment and approved practical training, while M-1 employment options are more limited. Check the rules for your category with your school official before starting work, because unauthorized employment can affect your status.
Q
What should I do if my student visa is refused?
Read the refusal information carefully and identify the reason for the decision. If you can establish eligibility with new evidence or changed circumstances, you may be able to submit another application. Review the current application instructions and costs before reapplying. If the issue involves alleged misrepresentation or a complex immigration matter, seek advice from a qualified U.S. immigration attorney.
Q
Can I use a tourist visa to study in the United States?
A visitor visa may allow certain short recreational courses that do not provide credit toward a degree or academic certificate. It generally cannot be used for a course of study leading to a U.S. degree or certificate. If your purpose is academic or vocational study, check the correct student visa category before traveling.
✦ Wrapping Up
Conclusion
Learning how to get a study visa starts with choosing the right educational program and confirming the correct immigration category. For most international students pursuing academic or vocational study in the United States, the process involves admission to an eligible school, the required student document, accurate application forms, applicable fees, financial evidence, and an interview when required.
A careful approach can reduce avoidable mistakes, but no school, adviser, or document can guarantee approval. Use official government instructions, answer every question truthfully, and allow enough time for appointments and possible additional processing. Once approved, review your travel documents and follow the rules for entry and student status.
💡 Key Takeaway
Start by selecting a suitable SEVP-certified U.S. school, reviewing its admission and funding requirements, and checking the official U.S. Department of State student visa instructions. Make a document checklist, confirm current fees and appointment procedures, and prepare a clear, truthful explanation of your study plans before applying.