
Applying for an American visa can feel like navigating a maze, especially when you first look into it. You're probably wondering, "how can I apply for an American visa?" and looking for clear, solid steps. It's understandable to feel a bit daunted, but breaking it down makes it much more manageable.
Thank you for reading this post, don't forget to subscribe!We've gathered information from official sources to help you understand the process. The key is identifying the right visa type for your specific situation, as that determines the exact requirements and procedures. This guide will walk you through the likely path you’ll need to follow.
What Kind of US Visa Do You Actually Need?
The first, and arguably most critical, step in applying for a US visa is figuring out which type of visa fits your reason for visiting. The U.S. Department of State has many different visa categories, each with its own set of rules and requirements. Picking the wrong one can lead to delays, rejection, or needing to start the process over.
Think of it like picking the right key for a specific lock; you need the exact match for it to work.
Here's a breakdown of common scenarios and the visa types they generally fall under:
- Tourism or Visiting Family/Friends: If your main goal is a vacation, sightseeing, or visiting relatives and friends in the U.S., you'll most likely be looking at a B-2 visitor visa. This visa is for temporary stays for pleasure.
- Business Purposes: For trips involving business meetings, attending conferences, or consulting with business associates, but not for employment in the U.S., you'd typically apply for a B-1 business visitor visa. Often, these are issued as a combined B-1/B-2 visa, covering both business and tourist activities.
- Studying in the U.S.: If you've been accepted into an academic program at a U.S. educational institution, you'll need an F-1 student visa. There are also M-1 visas for vocational studies. The application process for these will involve cooperation with your admitting school.
- Working in the U.S.: This category is broad and depends heavily on your specific job offer and qualifications. Common work visas include the H-1B for specialty occupations, L-1 for intracompany transferees, and O-1 for individuals with extraordinary ability. These usually require sponsorship from a U.S. employer.
- Exchange Programs: If you are participating in cultural exchange programs, internships, or au pair positions, you will likely need a J-1 visa.
Your purpose of travel is the primary condition that dictates your visa path. The U.S. Department of State provides an online tool to help assess your eligibility for different visa types based on your answers to specific questions about your travel intent. This is your starting point for ensuring you're on the right track.
Avoiding the Biggest US Visa Application Mistakes

Making a mistake on your visa application is more than just an inconvenience; it can lead to significant delays, cost you money, or even result in a denied application. Our research indicates that applicants often trip up on a few key areas. Being aware of these common pitfalls can help you sail through the process much smoother.
Here are some of the most frequent missteps we see:
- Incorrect Visa Category Selection: This is a huge one. Applying for a B-2 tourist visa when you actually intend to work, or vice-versa, is a recipe for disaster. If your purpose isn't accurately reflected in your visa choice, your application will likely be refused.
- Providing False Information: Never, ever lie on your application or during your interview. This includes misrepresenting your intentions, your financial situation, or your ties to your home country. This can lead to permanent inadmissibility to the United States, which is a very serious consequence.
- Incomplete or Inaccurate DS-160 Form: This is the primary online application. It requires detailed information about your background, travel plans, and personal history. Missing fields, typos, or vague answers can raise red flags. Ensure all information is precise and complete.
- Not Demonstrating Sufficient Ties to Your Home Country: For most non-immigrant visas, consular officers need to be convinced that you have strong reasons to return to your home country after your temporary stay in the U.S. This means showing proof of employment, family responsibilities, property ownership, or financial assets at home. Failing to do so is another common reason for denial.
- Misunderstanding Interview Requirements: Some applicants don't prepare for the interview, thinking it's just a formality. The consular officer uses this conversation to verify your application details and assess your intent. Not being able to clearly articulate your purpose or answer questions honestly can be detrimental.
- Not Having All Required Documents: Each visa type has a specific list of supporting documents. Showing up to your interview with missing paperwork, or documents that don't align with your application, can cause your case to be postponed or denied.
To avoid these common errors, it’s vital to thoroughly read the instructions for your specific visa type on the U.S. Department of State’s website and gather all necessary documentation well in advance. The U.S. Embassy or Consulate website for your country will also have country-specific information and requirements.
The DS-160 Form: Your First Big Step
The DS-160, Online Nonimmigrant Visa Application, is where your U.S. visa application journey officially begins. Think of it as the backbone of your application; it's the detailed questionnaire that gathers all the essential information the U.S. government needs to evaluate your eligibility for a visa. This form must be completed online before you can schedule your visa interview. It’s not a form you can fill out on paper and mail in.
What the DS-160 Asks For
The DS-160 is comprehensive. It requires you to provide a lot of personal information, so it's best to have certain documents and data readily available before you start. This includes:
- Passport Details: Your current passport number, issue date, and expiration date. Your passport must typically be valid for at least six months beyond your intended period of stay in the U.S.
- Travel Itinerary: Information about your planned travel dates and where you intend to stay in the U.S., including any hotel reservations or contact information for hosts.
- Previous U.S. Travel History: Details of any prior visits to the U.S., including dates and visa types, if applicable.
- Personal and Family Information: Your full name, date of birth, place of birth, nationality, marital status, and information about your parents and spouse.
- Education and Work History: Details about your current and past employment, including company names, addresses, dates of employment, and job duties. You'll also need to list your educational background, including schools attended and degrees obtained.
- Security and Background Information: A series of yes/no questions related to security, criminal history, and immigration violations. Honesty is paramount here.
- Digital Photograph: You'll need to upload a recent digital photograph that meets specific U.S. visa photo requirements. These requirements detail everything from head size and background color to image resolution and file format.
Tips for Completing Your DS-160
- Use an Official Website: Always access the DS-160 form through the official U.S. Department of State Consular Electronic Application Center (CEAC) website. Beware of unofficial sites that might charge you for access or information.
- Save Your Progress: The form is designed to be saved. You’ll get an Application ID, which is crucial for returning to your application. Save frequently to avoid losing your work, especially if your internet connection is unreliable.
- Answer Honestly and Accurately: Double-check all your answers for accuracy. Even small errors can cause problems later. If you’re unsure about an answer, it’s better to seek clarification than to guess.
- Be Prepared for Language: The primary language for the DS-160 is English. If English is not your native language, you can access a translation feature to understand the questions, but you must answer in English.
- Print Your Confirmation Page: Once you submit the DS-160, you'll receive a confirmation page with a barcode. You absolutely must print this page, as you will need it for your visa interview.
Completing the DS-160 accurately and truthfully is foundational to a successful visa application. It sets the stage for the rest of the process, including your interview.
Paying the US Visa Fee and What It Means
After you’ve completed your DS-160 and are ready to move forward, the next crucial step is paying the applicable visa application fee. This fee, often referred to as the Machine Readable Visa (MRV) fee, is a mandatory requirement for most U.S. visa applications. It's important to understand that this fee is generally non-refundable, regardless of whether your visa is approved or denied. Think of it as a processing charge for the application itself.
Fee Amounts and Payment Methods
The cost of the visa application fee can vary. For most non-immigrant visas, like the B-1/B-2 (tourist/business), F-1 (student), and J-1 (exchange visitor), the fee is currently $185 as of 2026. However, certain visa types, particularly some employment-based visas, may have different or additional fees. Always check the official U.S.
Department of State website or the specific U.S. Embassy or Consulate website for your country to confirm the exact fee amount and what it covers.
Payment methods also vary by country. Typically, you can pay online through an authorized payment portal, at designated banks, or via other locally approved methods. You'll usually need to print a payment confirmation slip, which you'll need to keep safe. This slip is often required when scheduling your visa interview.
Why the Fee is Non-Refundable
The non-refundable nature of the visa application fee is standard for most government services worldwide. The fee covers the administrative costs associated with processing your application, including reviewing your DS-160, maintaining the application system, and scheduling your interview. Even if your visa is denied because you don't meet the eligibility requirements, or if you withdraw your application, the government has still incurred these administrative costs. Therefore, they do not refund the payment.
What if My Visa is Denied?
If your visa application is denied, you will not receive a refund for the MRV fee. You would need to pay the fee again if you decide to reapply for a U.S. visa in the future. This is why it's so important to ensure you are applying for the correct visa type and that you meet all the eligibility requirements before you submit your application and pay the fee. Thoroughly understanding the requirements for your chosen visa category, as outlined on the official government websites, is your best strategy to avoid this situation.
Booking Your US Visa Interview: What to Expect
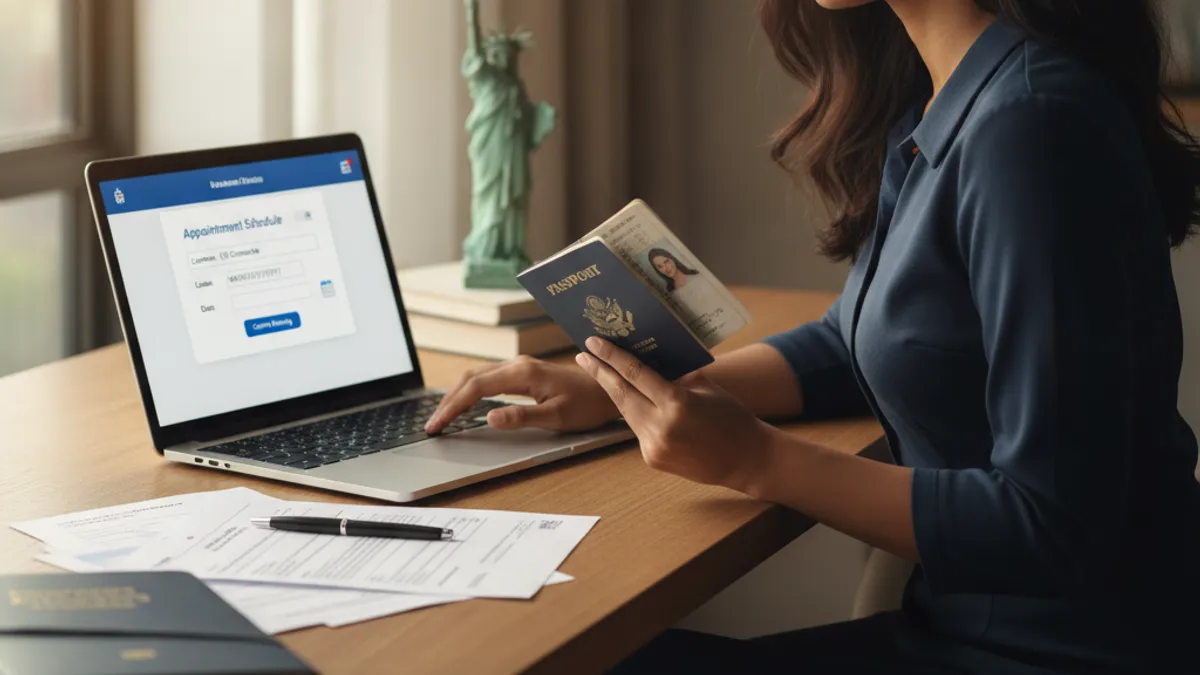
Once you’ve completed your DS-160 form and paid your visa application fee, the next crucial step is to schedule your visa interview. This interview takes place at a U.S. Embassy or Consulate in your home country. It’s a standard part of the process for most types of U.S. visas, and it's where a consular officer will review your application in person and ask you questions.
The process for scheduling your interview is usually done online through the official visa appointment system for your region. You'll typically need your DS-160 confirmation number and your visa fee receipt number to log in and select an available appointment slot.
Getting an Appointment
- Check Wait Times: It’s a good idea to check the estimated wait times for visa interviews on the U.S. Department of State's website or the specific embassy/consulate site before you pay your fee or start the application. These wait times can fluctuate significantly depending on the location, the time of year, and the volume of applications. Some locations might have appointment availability within a few weeks, while others could be several months out.
- Select Your Location: You must schedule your interview at the U.S. Embassy or Consulate in your country of residence. In some cases, if you are a resident of a country with no U.S. embassy or consulate, you might be permitted to apply at one in a neighboring country, but this needs prior approval and is not standard.
- Availability: Appointment slots can fill up quickly, especially for popular visa categories or during peak travel seasons. If you have specific travel dates in mind, try to book your interview as soon as possible. If you can't get an appointment that suits your timeline, you may need to be flexible with your travel plans or wait for cancellations.
- Confirmation: After successfully selecting and confirming your appointment, you’ll receive an appointment confirmation page. Make sure to print this page, as you will need to present it to enter the embassy or consulate, and it often has details about what to bring.
What the Interview Itself Is Like
During the interview, you'll typically be asked questions about your travel plans, your reasons for wanting to visit the U.S., your financial situation, and your ties to your home country. The consular officer's goal is to verify the information on your DS-160 and ensure you meet the eligibility requirements for the visa you're applying for, as well as confirm your intent to depart the U.S. at the end of your authorized stay. Being honest, concise, and prepared is key to making this part of the process go smoothly.
Gathering Your US Visa Documents: The Essential Checklist
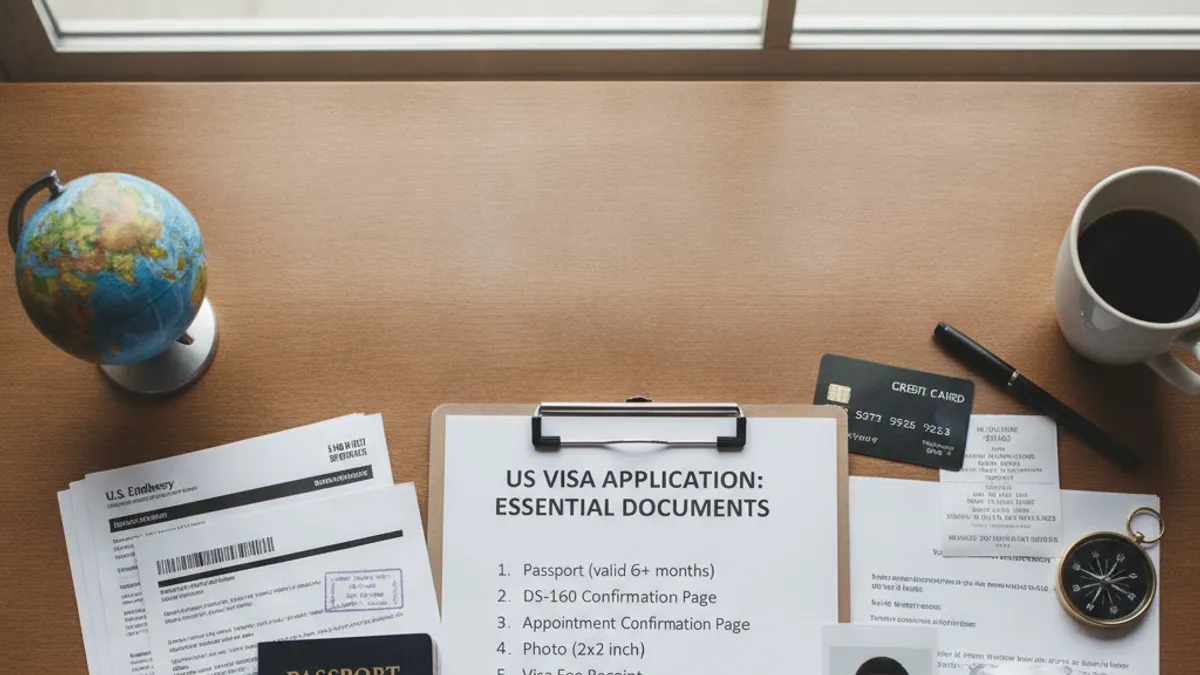
Having all the correct documents ready for your U.S. visa interview is absolutely critical. Think of your documents as the evidence that supports your application and helps the consular officer make a decision. While the exact list will vary depending on the specific visa type you're applying for (e.g., tourism, study, work), there are some core documents that are almost always required.
Here’s a general checklist of essential items you'll likely need. Always refer to the specific requirements for your visa category on the U.S. Department of State or your local Embassy/Consulate website, as this is not an exhaustive list for every single visa type.
Core Documents (Required for Most Applicants)
- Valid Passport: Your passport must be valid for at least six months beyond your intended period of stay in the United States. It should also have enough blank pages for visa stamps. If your passport has expired, you'll need to renew it before applying.
- DS-160 Confirmation Page: This is the confirmation page you receive after submitting your online application. It includes a barcode that the consular staff will scan. Make sure it's printed clearly.
- Visa Interview Appointment Letter: The confirmation letter you receive when you schedule your interview. This verifies your appointment date and time and is usually required for entry into the embassy or consulate.
- Visa Application Fee (MRV Fee) Receipt: Proof that you have paid the non-refundable visa application fee. The method of payment and the exact receipt format will depend on the country where you paid.
- Digital Photograph: A recent photograph that meets the specific U.S. visa photo requirements. While you upload this with your DS-160, it's a good idea to bring a physical copy that meets the specifications, just in case. The photo needs to be 2×2 inches (5×5 cm) with a white background, taken within the last six months.
Supporting Documents (Varies by Visa Type)
These are documents that help prove your eligibility for the specific visa you are applying for and demonstrate your ties to your home country.
- For Tourists/Business Visitors (B-1/B-2):
- Evidence of your intent to depart the U.S. at the end of your temporary stay (e.g., return flight ticket reservation, confirmation of study or employment back home, property deeds).
- Proof of sufficient funds to cover your expenses during your trip (e.g., bank statements, pay stubs, sponsorship letters).
- For business trips: Letter of invitation from a U.S. company, conference registration details.
- For Students (F-1):
- Form I-20, "Certificate of Eligibility for Nonimmigrant Student Status," issued by your U.S. school.
- The SEVIS (Student and Exchange Visitor Information System) I-901 fee payment receipt.
- Academic transcripts, diplomas, degrees, or certificates from schools you attended.
- Proof of financial means to support your studies and living expenses in the U.S.
- For Work Visas (e.g., H-1B):
- Your approved petition (Form I-797, Notice of Action).
- Job offer letter from the U.S. employer.
- Resume or CV.
- Copies of degrees, licenses, or certifications relevant to the job.
It is always better to bring more supporting documents than you think you might need. You can also organize your documents neatly in a folder so they are easy to present if requested by the consular officer.